

Some of the most useful things a family knows have never been written down. They live in the way one person folds the dough, resets the breaker, winterizes the camper, sharpens a tool, or gets the old sewing machine working again.
You may have explained the task a dozen times. That is not the same as leaving behind something your family can replay when you are not standing beside them.
Learning how to record a how-to video does not require a studio or a polished on-camera personality. It requires one useful task, a phone, and enough planning to make the steps easy to follow.
Here is how to record a how-to video: pick one task, list its steps, and set your phone where it captures your hands and workspace. Record a short sound-and-picture test, teach each step in a separate clip, trim confusing parts, then save the original in two places before sharing a copy.
Please note this page may contains affiliate links. If you purchase something through these links, I’ll receive a commission at no extra cost to you. Affiliate links help to support my website/blog and I only recommend products I love.
Table of Contents
- Pick One Skill and One Person to Teach
- Plan the Five Beats Before You Press Record
- How to Record a How-To Video With Your Phone
- Record in Short Sections
- Trim Only What Gets in the Way
- Share It Without Losing the Original
- Frequently Asked Questions
Pick One Skill and One Person to Teach
The easiest way to make this project too big is to start with, “I should record everything I know.” That thought creates a list, the list becomes a project, and the project waits for a free weekend that never comes.
Start smaller. If you are figuring out how to record a how-to video for the first time, pick one task with a visible finish line.
“How I make Sunday sauce” is a task. “Everything I know about cooking” is not. “How to shut off the water before a freeze” is a task. “Home maintenance for the kids” is not.
Now picture one person who might use the video. Maybe it is your daughter making the recipe for the first time. Maybe it is a grandchild who will inherit your tools. Maybe it is your spouse trying to remember the odd sequence that gets a stubborn appliance working.
That person gives you a better standard than “Does this look professional?” Ask, “Could they complete the task without calling me?”
This is where a practical tutorial becomes part of a legacy video made for your children. It preserves more than instructions. Your voice, your hands, and the little warnings you have learned through repetition come along with it.
Choose a task that meets three tests:
- Someone in your family may actually need it.
- You can show a finished result.
- You can teach it in one sitting.
If your first idea fails one of those tests, narrow it. Record one repair, not the whole workshop. Record one holiday dish, not the entire meal.
Plan the Five Beats Before You Press Record
A full script can make a first video harder. When learning how to record a how-to video, you can spend more time worrying about exact wording than showing the task.
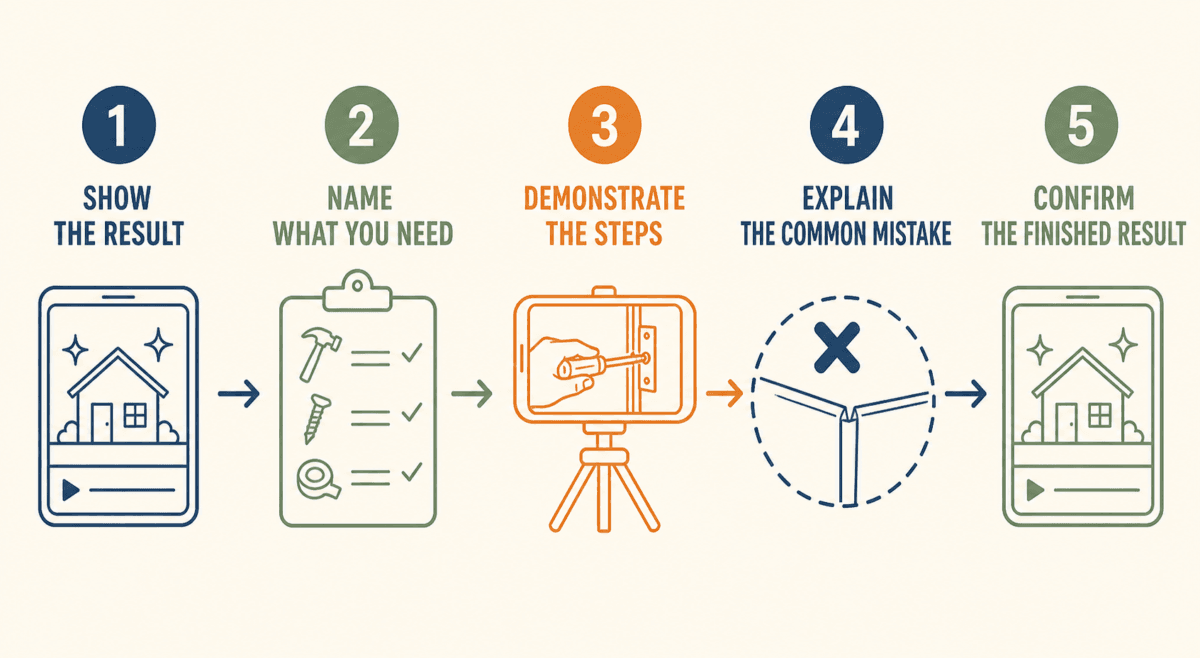
Use five cue lines instead:
- Show the finished result.
- Name what the viewer needs.
- Demonstrate the steps in order.
- Explain the common mistake.
- Confirm what “done” looks like.
Those five beats work for a recipe, a repair, a craft, a computer setting, or a household routine. They also keep the video focused on what the viewer needs to do.
Suppose you are recording how to thread your sewing machine. Start by showing the finished setup. Put the spool and machine instructions beside you. Demonstrate the threading route for that model, pause at the spot you usually miss, and finish with a test on scrap fabric. Keep the camera close enough to show the thread path.
The common mistake may be the most valuable part. People who know a task well often skip the judgment calls they make without thinking. “If it sounds like this, stop.” “This side faces up.” “Use less than you think.” “Do not tighten it past this point.”
Write those details on your cue card. They are the difference between watching someone work and learning how to repeat the work.
Do one dry run without the camera. Set out the items in order and talk through the steps. If you have to leave the room, hunt for a tool, or remember a missing step, fix that before recording.
You are not rehearsing a performance. You are removing avoidable confusion. That is the useful part of learning how to record a how-to video: noticing what a beginner cannot see yet.
How to Record a How-To Video With Your Phone
The phone already in your pocket is probably good enough. The University of California Agriculture and Natural Resources calls a smartphone an excellent recording tool and puts special emphasis on clean audio. Their guidance notes that poor audio distracts viewers more than imperfect video.
Before you record, wipe the camera lens with a clean cloth. A fingerprint can make a bright kitchen or workshop look hazy, and it takes two seconds to remove.
Use horizontal video when the family may watch on a computer or television. Vertical can make sense when the task lives on a phone screen, but horizontal gives hands, tools, and a work surface more room in most household demonstrations.
Keep the phone still. A basic phone stand is fine if you already own one. A shelf, a stack of books, or a solid container can work too. The goal is a stable view that does not make the viewer fight the camera movement.
Frame the action, not just your face. If you are teaching a knot, a recipe, or a repair, your hands and the work area carry most of the lesson. Set the camera slightly above and to the side so your arms do not block the important part.
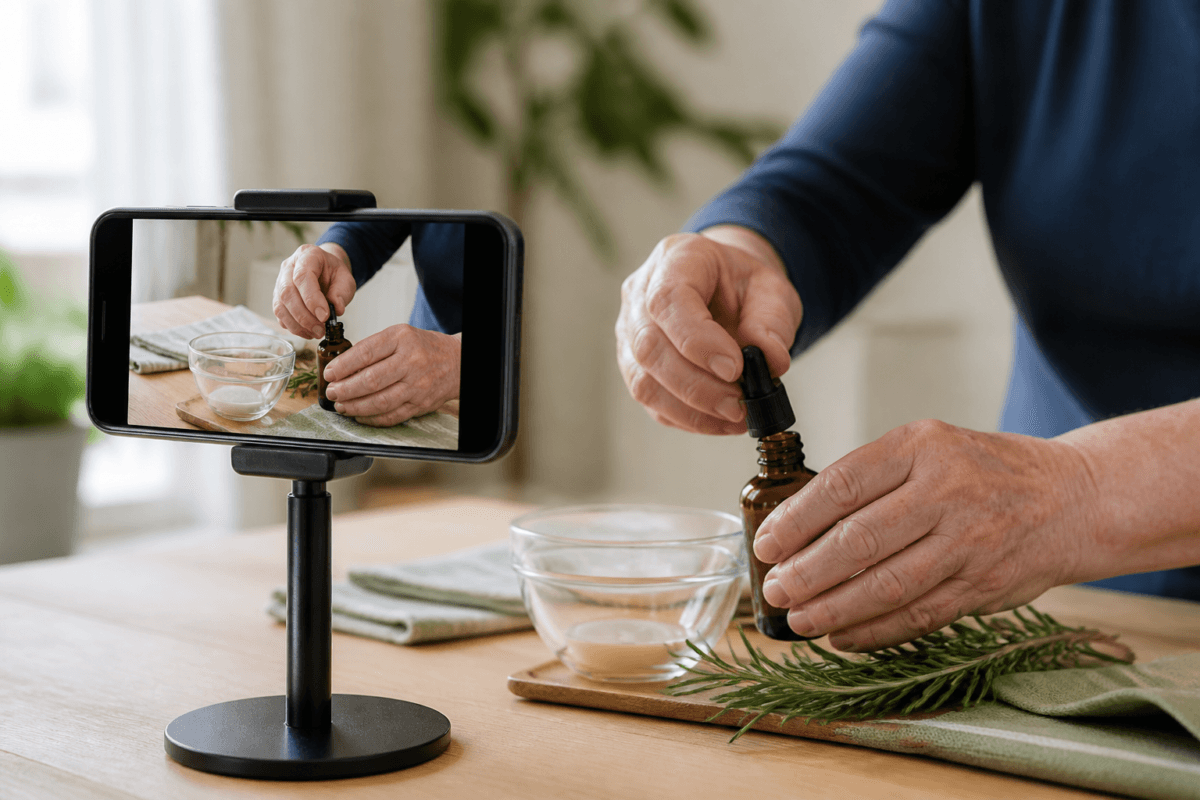
Light should fall on the task from the front or side. A window can do the job. Avoid placing the brightest window directly behind you because the phone may turn the subject dark while it tries to expose the background.
Then make a 15-second test. Say a sentence at the volume you plan to use, move your hands through the work area, and play the clip back with sound. This is how to record a how-to video you can actually hear, not just one that looks tidy.
Check four things:
- Can you hear every word without turning the volume all the way up?
- Can you see the small part, measurement, or screen control that matters?
- Do your hands stay inside the frame?
- Is there a fan, television, or appliance covering your voice?
Fixing one of those problems now is much easier than discovering it after a 20-minute take.
If pressing Record still feels strangely hard, the same low-pressure approach in making your first short video after 40 applies here. The first clip is a test, not a final exam.
Record in Short Sections
Trying to record the entire task in one perfect take creates a silly kind of pressure. One wrong measurement near the end can make you feel as if you have to start over.
You do not.
Wondering how to record a how-to video without restarting every time you stumble? Record one section at a time. Leave a quiet pause before and after each step. If you make a mistake, stop, take a breath, and repeat that step from the beginning.
Those pauses give you clean places to trim later. They also make it easier for a viewer to stop the video, complete a step, and come back.
Say specific details out loud. A viewer may not be able to read a tiny label or judge a distance from the picture. Name the measurement, model, setting, temperature, tool size, or warning sign while you show it.
Use plain directions. “Turn this a little” is hard to copy. “Turn it a quarter turn clockwise, then stop when the marks line up” gives the viewer something they can verify.
Keep useful mistakes when they teach the task. If a lid will not seat unless one tab is aligned, show the failed position and the correction. If dough looks too dry before it comes together, show that stage and explain what to watch for.
You can also speak to the future viewer for a moment. Tell them why your family does it this way, who taught you, or when the routine usually happens. One honest sentence can give the instructions a sense of place without turning the video into a speech.
That quiet sharing is similar to the approach in passing values to grandchildren without lecturing. The lesson comes through the task instead of arriving as a sermon.
If you want a running start, the free 30 Living Legacy Questions PDF gives you a full set of prompts built for exactly this, and many of them work just as well pointed at yourself as they do pointed at a parent.
Trim Only What Gets in the Way
Editing is where many simple family videos get stuck. People assume they need music, animated titles, multiple camera angles, and an app they have never used.
For this project, editing has one job: remove what makes the instructions harder to follow. Learning how to record a how-to video does not mean learning every feature in an editing app.
Use the editing tool built into your phone to trim the fumbling before the first step and the long reach toward the camera at the end. Remove a failed take if you repeated it cleanly. Keep a natural pause when the viewer may need a moment to look at the result.
If you recorded separate clips, place them in order in a video editor that supports combining clips. Your phone’s basic trim tool may not do this. An equally simple option is to keep a numbered set of short videos in one shared folder. Label them “1 Materials,” “2 Setup,” and so on, so nobody has to guess the order.
You do not need background music. Keep the focus on your voice and the sounds of the task, especially when the viewer needs to hear a warning or a measurement.
Captions can help family members who are hard of hearing, watching without sound, or trying to catch a measurement. Add them if the sharing platform makes that easy, but do not let a perfect transcript hold up the first useful video.
Give the file a name that will make sense years from now. “IMG_4827” tells nobody what is inside. A fictional example such as “2026-09-01-Sam-sewing-machine-threading.mp4” includes the date, person, and subject.
Add a short text note when the task depends on details that may change. Record the appliance model, ingredient list, tool size, or location of a shutoff valve. The video shows how the task works. The note makes the facts easy to find.
Watch the finished video once from beginning to end. Better yet, send it to the person you pictured at the start and ask one question: “Where did you feel unsure?”
If they identify a missing detail, record a short correction or add a note. You do not need to rebuild the whole video.
Share It Without Losing the Original
Sharing and preserving are two different jobs. Knowing how to record a how-to video is only half the project if nobody can find it later. A viewing link is convenient, but keep an original file you control too.
For a small family group, a direct cloud folder can be the simplest option. Give access only to the people who need it, and make sure at least one other person can manage the folder if your account changes.
YouTube offers Private and Unlisted visibility. According to YouTube Help, a Private video is limited to you and the viewers you choose. An Unlisted video stays off your public Videos tab, but anyone with the link can watch and reshare it. It can also appear in search if someone adds it to a public playlist.
That distinction matters. Unlisted means less visible, not confidential. Use Private or a controlled cloud share for family material you would not want forwarded.
Keep the original file outside the viewing platform. The National Archives, in guidance reviewed November 14, 2023, recommends three copies on different media and, where possible, in different locations. Its advice also covers descriptive folders and checking files as formats and devices change. Start with two separate copies today, then add a third for material you cannot replace.
A practical family plan is simple:
- Keep the original file on a computer or primary drive.
- Keep a second copy in a different place, such as a reputable cloud account or another drive stored elsewhere.
- Use a descriptive filename.
- Tell another family member where the files are and how to access them.
- Check the collection occasionally and move it when devices or services change.
Do not make a text-message thread your only archive. Save the file in the family folder too, so finding it does not depend on remembering which conversation held the good copy.
Once you have recorded a practical skill, you may notice other kinds of knowledge worth saving. The questions and listening approach in recording your parents’ life stories can help you capture the story behind the task too.
The Bottom Line
The best family how-to video is not the one with the cleanest lighting or the cleverest edit. It is the one a person you love can find, understand, and use. That is your standard for how to record a how-to video worth keeping.
Choose one task. Put the phone where it can see the work. Explain the step you usually do without thinking. Save the original in two places.
What is one family skill you would hate to see disappear because nobody recorded how it was done?
Frequently Asked Questions
How long should a family how-to video be?
Long enough to finish one task without rushing. Aim for one clear demonstration, then cut repetition. Clarity matters more than reaching a particular number of minutes.
Should I record horizontally or vertically?
Use horizontal video when family may watch on a computer or television, or when the workspace is wide. Vertical can suit a narrow task watched on a phone.
Do I need an external microphone?
No. Start in a quiet room, move the phone closer, and record a short test. Clear speech matters more than expensive sound gear.
What is the safest way to share a family video?
A direct cloud share or YouTube Private gives tighter control. YouTube Unlisted is easier, but anyone with the link can reshare it.
How do I keep the video from getting lost?
Keep the original file, give it a descriptive name with the date and subject, store copies in at least two places, and tell another family member where they live.